I’ve been using Intuit products for years and most recently found the Quicken Essentials for Mac program. I’ve been using the Quickbooks Online program for my business income and have been really happy with how easy it is to manage everything.
So, I thought I’d give Quicken Essentials for Mac a try and I can say the same thing – it’s really easy to manage everything on my personal accounts as well! I liked it so much, I wanted to put together a Quicken Essentials for Mac review for anyone considering purchasing the program.
Getting Started: Quicken Essentials Review
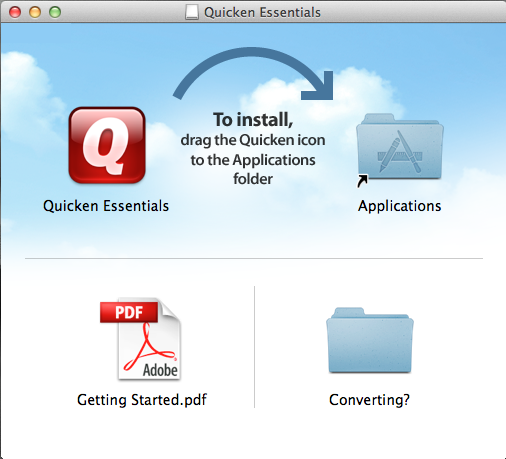
Installing Quicken Essentials for Mac is simple. Simply doubleclick your downloaded dmg file and the install window will show up. Drag the Quicken icon to your applications folder.
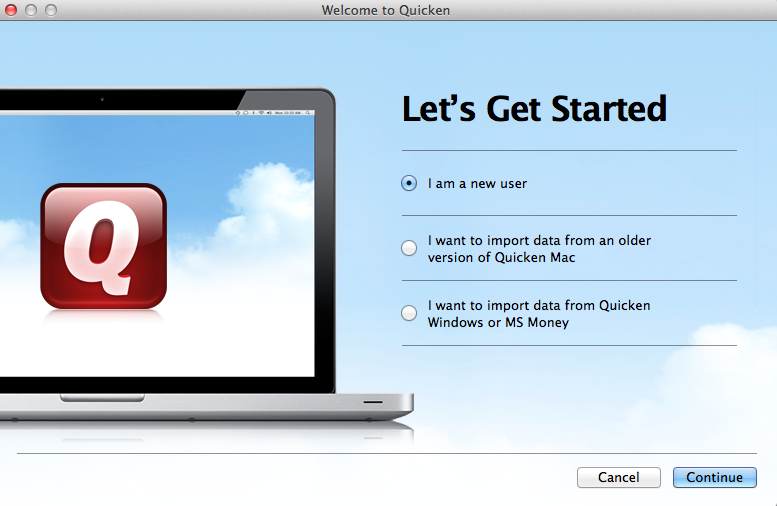
Next, open your Applications folder and doubleclick on the newly installed Quicken Essentials for Mac app. Agree to the terms and conditions and you will be directed to this screen.
Setting Up Your Accounts With Quicken Essentials for Mac
On the first screen that appears when you install Quicken Essentials for Mac, you’ll be prompted to Get Started by entering your username and password for your financial accounts. This is so that Quicken can track your finances automatically for you. If you’ve used Quicken Windows, Quicken Mac, or MS Money, you will be given the opportunity to import your information. But if this is your first time with Quicken, just click ‘I’m a new user.’
Add Your Bank: Log In or Manually Upload
Since this is the first time I’m using Quicken, I chose “I am a new user” and was prompted to choose my bank. There are hundreds of banks listed, so there’s a good chance yours will be listed. If it’s not listed, don’t worry! Check with your bank to see if they have the option to download your transactions in a Quicken format. Then you can upload it to the application by dragging and dropping the file manually.
Getting Organized: Sorting Your Transactions 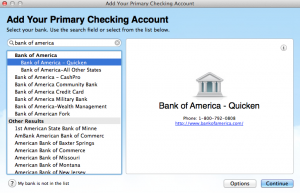

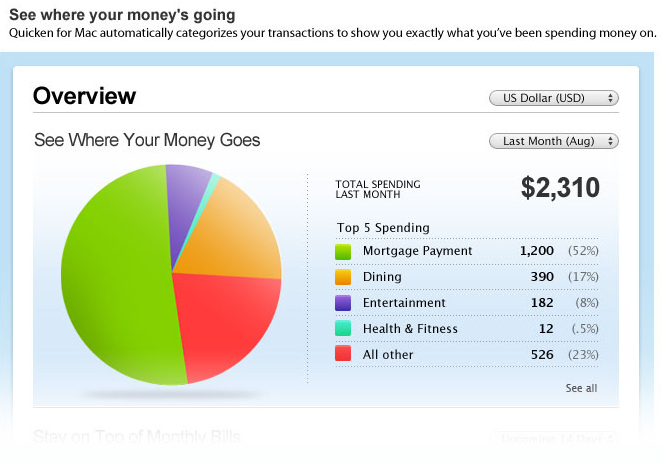
Once you’ve added your bank info and uploaded your transactions, Quicken starts working to organize your transactions. I felt that it did a really good job discerning the categories like groceries, dining, insurance, utilities, and auto. Of course, you can manually change the categories, add new ones, and assign transactions to specific categories and Quicken will learn from your changes.
Adding a Credit Card
If you’re like me, you’re probably wondering how Quicken Essentials for Mac recognizes credit card transactions and payments to your credit card. Some budgeting software can be confusing because it makes it appear as though you’ve spent twice as much as you really did in a month because it counts the credit card payment and credit card transactions as expenses. With Quicken Essentials, your credit card transactions are automatically categorized and your credit card payments from your bank can be categorized or even deleted. I prefer to keep the credit card payments in a category called ‘credit card’ so that it shows on my home screen.
Adding Bills: The Bill Reminder Feature
A lot of my bills are on automatic payment, but for the ones that come due each month, I set a reminder on my phone. A cool feature from Quicken is the ability to let it search your transactions to find a recurring bill. Simply click on the get started button in the bills section, and Quicken will sift through your transactions to find recurring bills. You can choose which bills you want to add and Quicken will keep notes on when the bills are due – which are easy to see on the home screen of your account.
Setting Goals: Quicken Essential’s Budget Goal Tool
Ok, now this was just plain awesome. When I clicked on the goal options, Quicken Essentials for Mac did a review of my budget based on the past 3 months of my spending history and suggested specific categories that I should monitor more closely. Not only that, Quicken suggested a goal for the new month (you can edit this goal) and created a budget based on that goal.
So if you’ve been putting off making a budget because the idea of going through your transactions line by line sounds like a nightmare, this tool is exactly what you’ve been waiting for. Even better, Quicken puts these goals on the Overview page, allowing you to see your budget, current spending, and bills all on one page. I’ve yet to see a budgeting software create a one page snapshot, which is really nice!
Recommendation: Try it out! 
Here’s the deal – if you’re wanting to get a better handle on your money and want to manage and access it from your computer at any time (even without an internet connection), then Quicken Essentials for Mac is a great tool. It’s only $49 and well worth it.
My favorite features were listed above, but Quicken Essentials for Mac has a lot more to offer. Here are a few features from their website:
Quicken Essentials lets you:
- Track your investments
- Export to TurboTax
- Print Checks
- Convert Old Data from Quicken Mac 2006, 2007
Quicken’s Promise: 100% Satisfaction Guarantee
If you’re not completely satisfied, Quicken will give you a refund of the purchase price for Quicken Essentials within the first 60 days. That’s plenty of time to try out the software to see how well can track your money.
So it’s up to you! If you’re on the fence about personal finance budgeting software I highly recommend trying Quicken Essentials. It’s perfect for your family budget, or for your college student – it really is a great tool for everyone.
Have you used Quicken before? Let us know what you think about Quicken Essentials for Mac!

Family Finances and Household BudgetsTake a look at overheads.
If you re Mac user who is new to personal finance software, Quicken Essentials may just be enough for you.